If you have a new PC that does not have an operating system installed, or you want to upgrade or reinstall Windows, you might be wondering how to do it. In this article, we will show you how to install Windows 10 or Windows 11 on a new PC using a USB flash drive or an ISO file. We will also explain the system requirements and compatibility of Windows 10 and Windows 11, the steps involved in the installation process, and how to activate Windows after the installation.
System Requirements and Compatibility
Before you install Windows on a new PC, you need to make sure that your PC meets the minimum system requirements and is compatible with the Windows version you want to install. Here are the system requirements for Windows 10 and Windows 11:
Windows 10:
You need a PC with a 1 GHz or faster processor, 1 GB of RAM for 32-bit or 2 GB for 64-bit, 16 GB of hard disk space for 32-bit or 20 GB for 64-bit, a DirectX 9 or later graphics card with WDDM 1.0 driver, and a display with at least 800 x 600 resolution. Then you need an internet connection and a Microsoft account to access some features and updates. You can check the compatibility of your PC using the Windows 10 compatibility checker.
Windows 11:
You need a PC with a 1 GHz or faster processor with 2 or more cores, 4 GB of RAM, 64 GB of hard disk space, a DirectX 12 compatible graphics card with WDDM 2.0 driver, a display with at least 720p resolution, and a TPM 2.0 security chip. Th need an internet connection and a Microsoft account to complete the setup and access some features and updates. You can check the compatibility of your PC using the Windows 11 compatibility checker.
Preparing the Installation Media
To install Windows on a new PC, you need a USB flash drive or an ISO file as the installation media. A USB flash drive is a portable storage device that you can plug into your PC and boot from it. An ISO file is a disk image file that contains the Windows installation files. You can either burn the ISO file to a DVD or use a software tool to create a bootable USB drive from it.
To create a bootable USB drive or download an ISO file, you can use the Windows media creation tool, which is a free program provided by Microsoft. You can download the Windows media creation tool from the Windows 10 download page or the Windows 11 download page. After you download the tool, run it and follow the instructions on the screen. You will need a USB flash drive with at least 8 GB of space or a blank DVD if you choose to create an ISO file. You will also need to select the Windows edition, language, and architecture (32-bit or 64-bit) that you want to install.
Installing Windows on the New PC
Once you have prepared the installation media, you can proceed to install Windows on the new PC. Here are the steps to follow:
Step 1: Connect the USB drive to the new PC and turn it on. You may need to change the boot order in the BIOS or UEFI settings to make the PC boot from the USB drive. You can usually access the BIOS or UEFI settings by pressing a key such as F2, F10, F12, or Delete when the PC starts. Look for the boot menu or boot priority option and select the USB drive as the first boot device. Save the changes and exit the BIOS or UEFI settings.
![How to Set Computer to Boot from USB Drive [2024]](https://images.wondershare.com/recoverit/article/01/set-computer-to-boot-5.jpg)
![How to Set Computer to Boot from USB Drive [2024]](https://images.wondershare.com/recoverit/article/01/set-computer-to-boot-5.jpg)
Step 2: When the PC boots from the USB drive, you will see the Windows logo and a loading screen. Wait for the Windows setup to start. You will be asked to choose the Windows edition, language, keyboard layout, and time zone. Select the options that suit your preferences and click on Next.


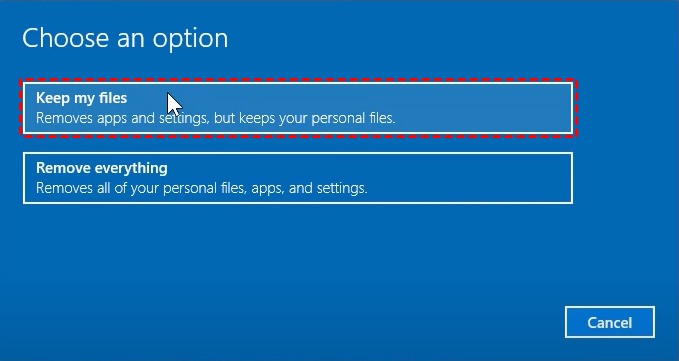
Step 3: On the next screen, you will see two options: Upgrade and Custom. Choose the Custom option if you want to install Windows on a new PC or a clean drive. If you choose the Upgrade option, you will keep your existing files, settings, and programs, but you need to have a previous version of Windows installed on the PC.


Step 4: On the next screen, you will see a list of drives or partitions where you can install Windows. Select the drive or partition where you want to install Windows. If you have a new or empty drive, you may need to create a new partition by clicking on the New button and specifying the size. You can also delete or format existing partitions by clicking on the Delete or Format buttons. Be careful not to delete or format any partitions that contain important data or recovery files. After you select the drive or partition, click on Next.


Step 4: The Windows installation will begin. You will see a progress bar and some messages on the screen. Wait for the installation to complete. It may take several minutes or hours depending on the speed of your PC and the size of the Windows files. Your PC may restart several times during the installation. Do not turn off your PC or remove the USB drive until the installation is finished.
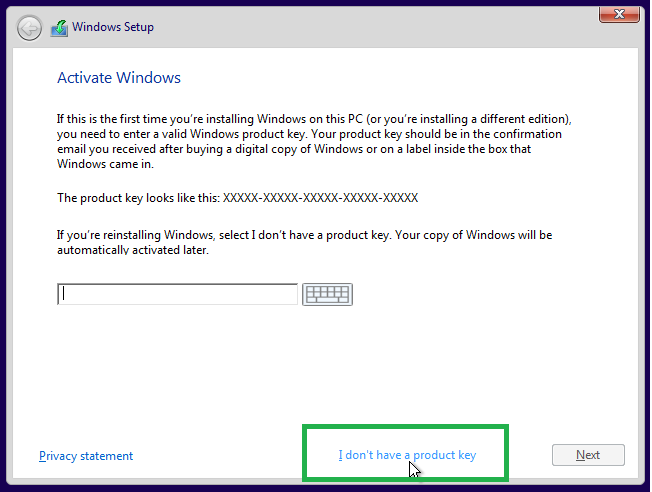
Step 5: After the installation is finished, you will see the Windows setup screen. You will be asked to enter your product key if you have one. A product key is a 25-digit code that activates your Windows license. You can find your product key on the packaging of your Windows DVD or USB drive, on a sticker on your PC, or in an email confirmation if you bought Windows online. If you do not have a product key, you can skip this step and activate Windows later.
Step 6: On the next screen, you will be asked to sign in with your Microsoft account or create a new one. A Microsoft account is an email address and password that you use to access various Microsoft services and features. You can also use a local account, which is a username and password that you use only on your PC.
![How to Create a Local Account on Windows 11 [5 Ways] | Beebom](https://beebom.com/wp-content/uploads/2022/09/IMG_20220917_130241.jpg?w=640&quality=75)
![How to Create a Local Account on Windows 11 [5 Ways] | Beebom](https://beebom.com/wp-content/uploads/2022/09/IMG_20220917_130241.jpg?w=640&quality=75)
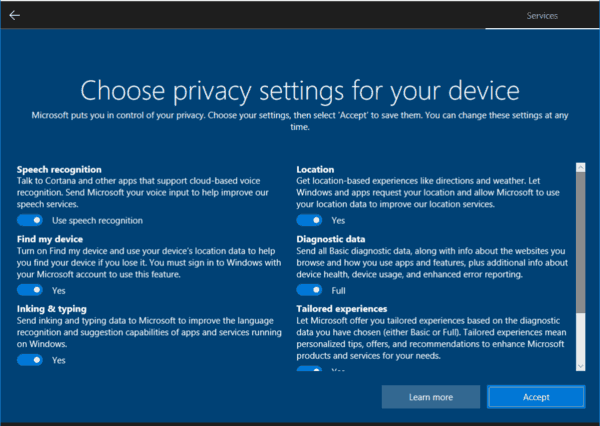
Step 7: On the next screen, you will be asked to adjust the privacy and personalization settings. You can choose which settings you want to turn on or off, such as location, speech recognition, diagnostics, tailored experiences, and advertising ID.


Step 8: After you finish the Windows setup, you will see the Windows desktop. You can remove the USB drive and restart your PC. You have successfully installed Windows on your new PC.
Activating Windows on the New PC
Activating Windows is the process of verifying that your Windows license is genuine and valid. Then activating Windows has some benefits, such as getting the latest updates, security patches, and features, as well as avoiding the activation watermark and the expiration of the trial period. There are different methods of activating Windows, depending on how you obtained your Windows license.
Step 1:
If you have a product key, you can activate Windows using the product key. You can enter the product key during the Windows setup, as mentioned above, or after the installation. To activate Windows using the product key after the installation, go to the Windows settings app, click on Update & Security, click on Activation, and click on Change product key. Enter your product key and click on Next. Follow the instructions on the screen to complete the activation.
Step 2: If you have a digital license, you can activate Windows using the digital license. A digital license is a digital entitlement that links your Windows license to your Microsoft account or your PC’s hardware. You can get a digital license if you upgrade from a previous version of Windows, if you buy Windows from the Microsoft Store, or if you have a PC that comes with Windows preinstalled. To activate Windows using the digital license, go to the Windows settings app, click on Update & Security, click on Activation, and click on Troubleshoot. Follow the instructions on the screen to verify your Microsoft account or your PC’s hardware and complete the activation.
Step 3: Alternatively, you can activate Windows using a third-party website or software. There are some websites or software that claim to provide cheap or free Windows licenses or activation tools. However, these methods are not official, legal, or secure. They may violate the Microsoft terms of service, expose your PC to malware or viruses, or cause errors or problems with your Windows installation. We do not recommend or endorse these methods, and we advise you to use them at your own risk.
Conclusion
In this article, we have shown you how to install Windows 10 or Windows 11 on a new PC using a USB flash drive or an ISO file. We have also explained the system requirements and compatibility of Windows 10 and Windows 11, the steps involved in the installation process, and how to activate Windows after the installation. Installing Windows on a new PC can be a simple and rewarding task, as you can enjoy the latest features, updates, and security of Windows. You can also customize and optimize Windows for the best performance and experience. We hope you found this article helpful and informative. If you have any feedback or questions, please feel free to leave a comment below.
Read More:
Why does Microsoft want to migrate Windows 11 to the cloud?

